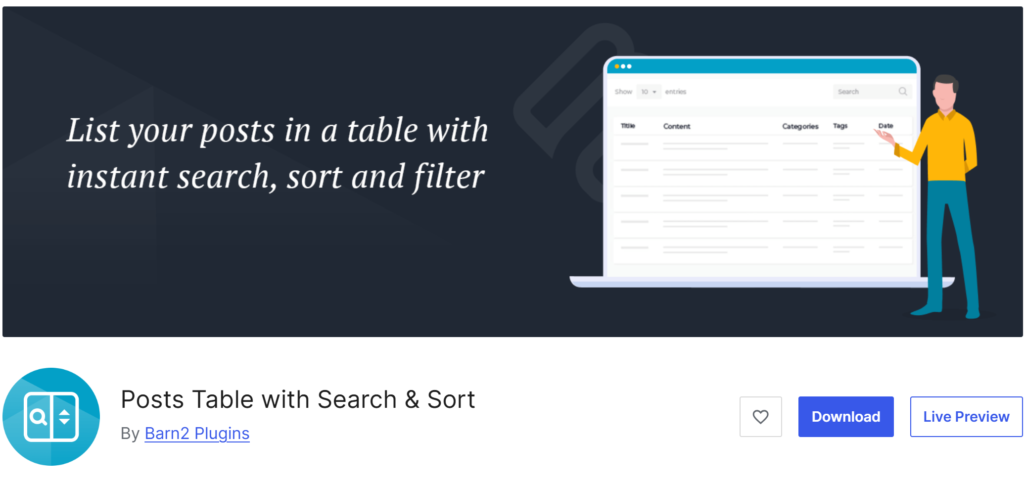
If you’re a plugin developer, you might have thought about adding a preview for your plugin in the repository. A preview feature is already available for the themes but plugin developers have not been able to show a demo of their plugin in the repository. In most of the cases, you had to go to the author’s website to see a demo. WordPress recently allowed plugin developers to add a preview button to the plugin page by using blueprint file and WordPress playground. The final button is going to look like this:

Right now, this is not enabled by default for all plugins and you need to create a blueprint file and then enable the preview feature.
What is WordPress playground?
Before knowing about previews, you should know about WordPress playground. This new tool allows you to easily create a test or staging WordPress website and play around with it. You can install any themes or plugins and apply any changes to the website without being worried about anything.
In order to have a preview for your plugin, we use WordPress playground as well.
What is a WordPress blueprint file?
A blueprint file holds a copy of your website at a certain time. With this file, you can tell WordPress what to do in order to run your website. It can have a list of your plugins, your themes and also a list of the things to do. You can see the blueprint file that we have used for our Posts Data Table plugin here:
{
  "landingPage": "/",
  "preferredVersions": {
      "php": "8.0",
      "wp": "latest"
  },
  "phpExtensionBundles": [],
  "steps": [
      {
          "step": "login",
          "username": "admin",
          "password": "password"
      },
      {
          "step": "installPlugin",
          "pluginZipFile": {
              "resource": "wordpress.org\/plugins",
              "slug": "posts-data-table"
          },
          "options": {
              "activate": true
          }
      },
      {
        "step": "runPHP",
        "code": "<?php\ninclude 'wordpress/wp-load.php';\nwp_insert_term( 'News', 'category', array( 'slug' => 'news'));\nwp_insert_term( 'Tutorial', 'category', array( 'slug' => 'tutorial'));"
      },

      {
        "step": "runPHP",
        "code": "<?php\ninclude 'wordpress/wp-load.php';\nwp_insert_post(array(\n'import_id' => 6,\n'post_title' => 'Different posts',\n'post_content' => '<!-- wp:paragraph -->\n<p>You can show different content in the Posts Table plugin.</p>\n<!-- \/wp:paragraph -->',\n'post_status' => 'publish',\n'post_author' => 1\n, 'post_category' => [3] ));"
      },
      {
        "step": "setSiteOptions",
        "options": {
            "show_on_front": "page",
            "page_on_front": "20"
        }
      }
  ]
}
The full documentation for the blueprint files can be found here.
As you can see in the code, we have specified the website information and after that, we have created the steps. Right now, these are some of the important steps supported by the blueprint file:
- Login
- installPlugin
- installTheme
- importWxr (for importing a file exported by WordPress)
- runPHP
- setSiteOptions
Remember that for the steps like importWxr, you need to pass the direct URL of the exported file to the blueprint file.
Not sure what steps you need to create your plugin demo? Leave a comment or contact me.
Add the blueprint file to the plugin
You should add the blueprint.json file to the assets/blueprints folder of your plugin. It’s better to validate your blueprint.json file before sending it to the WordPress repository.
You can also test your files simply by adding it to the playground website address like this:
https://playground.wordpress.net/#{blueprint_content}After this, just open this URL on your browser and you will see your blueprint file live.
Enable the preview for the plugin
After you have uploaded the file, you need to enable the “preview” button on the WordPress repository. Just go to the plugin page and click on the “Advanced view” link on the right sidebar:

On the next page, scroll down and you will find the “Toggle Live Preview” section. Here you can enable the preview for your plugin.
After this, the button will show up on your plugin’s page.
If you prefer to see this tutorial in a video, you can see it in our YouTube channel.

Leave a Reply